Getting to Know the Keyboard and Playing a Simple Tune
All the white keys on a piano keyboard are named after the first 7 letters of the alphabet - ABCDEFG - in a repeating sequence.
See the keyboard chart below:
See the keyboard chart below:
Notice how the black and white keys form a pattern. The black keys are grouped into twos and threes alternately. This pattern can help you to find specific white keys. E.g. notice how a C is the white key immediately to the left of each pair of black keys. See if you can find all the Cs on your own piano. You can do this with all the other letter names too, e.g. find all the Ds - these are the white keys that are in between the two black keys that form a pair; find all the Fs - these are the white keys immediately to the left of each group of three black keys etc. Doing this will help you to familiarise yourself with the keyboard and learn the letter names of all the white keys.
Here is a close up section of a keyboard:
Here is a close up section of a keyboard:
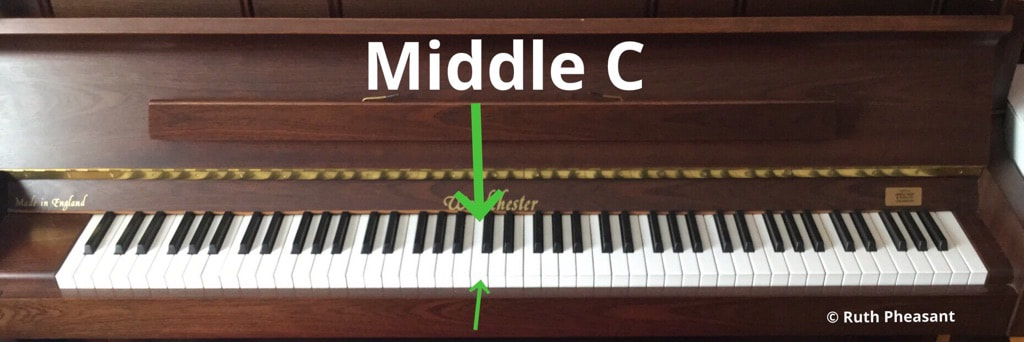
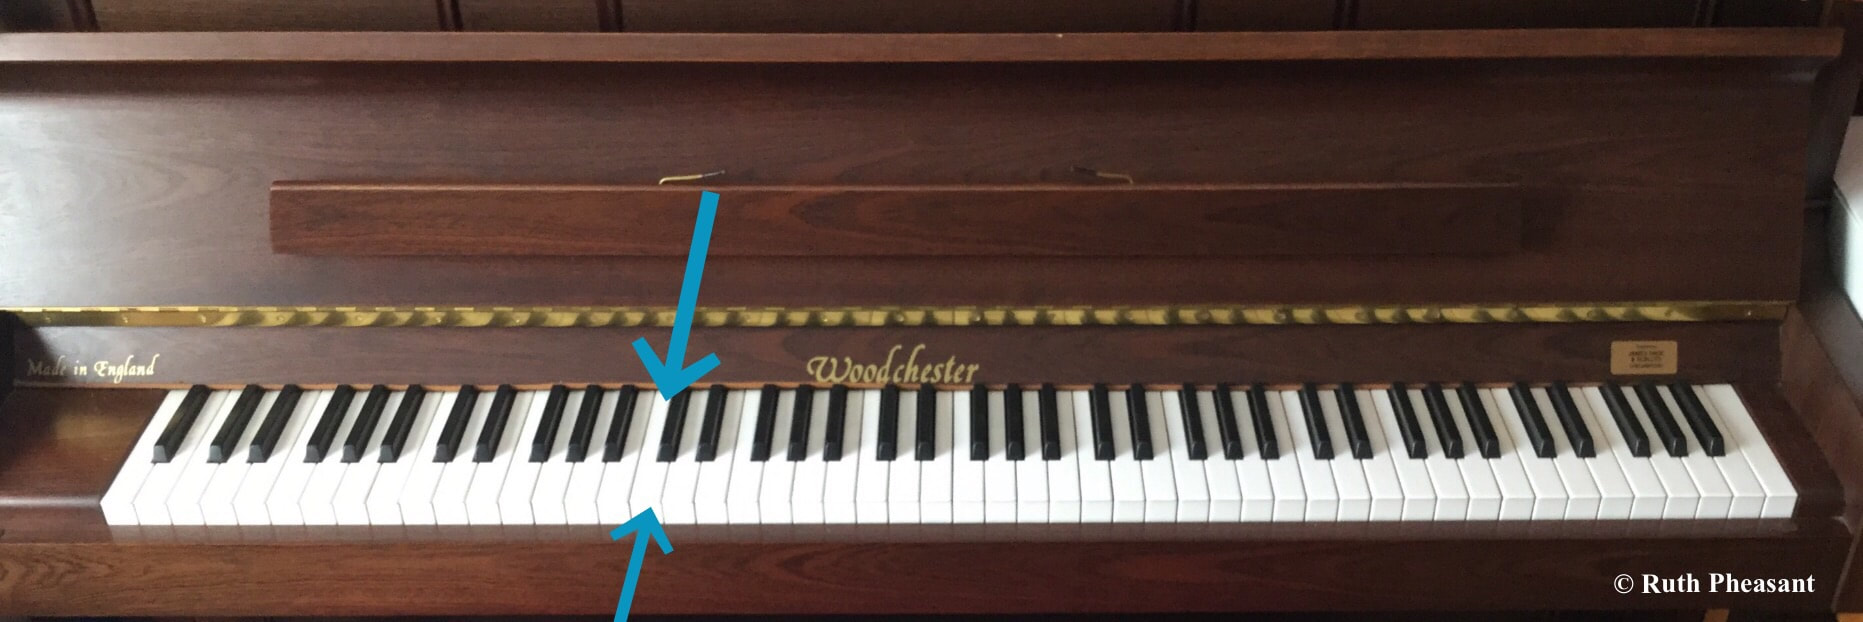
Next find middle C. This is the C nearest the middle of the piano. On a piano with the full range of keys, i.e. 88 keys, middle C is the fourth C from the bottom.*
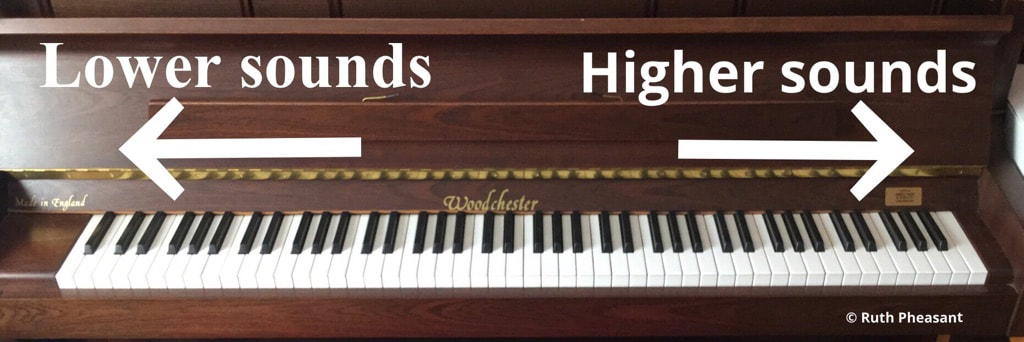
*The bottom of the piano is the furthest left, and the top is the furthest right. As you go from left to right along the keyboard, the sounds go from low to high:
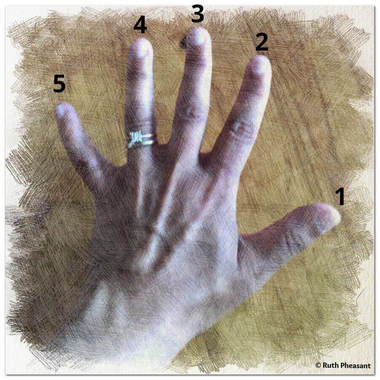
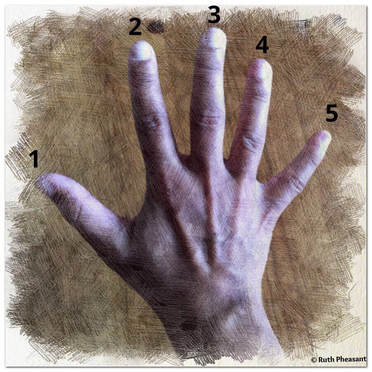
Next you can learn about finger numbers. For the purposes of playing the piano, each of your five fingers in each hand has a specific number. (In piano music the thumb is referred to as a finger.) This is so that when you look at a piece of sheet music and see finger numbers, you know which finger should play which note. This is very important for good technique as incorrect fingering can lead to bad habits.
See the pictures below:
See the pictures below:
For both hands, the thumb is always 1 and the little finger is always 5.
A Right Hand Tune
To start with, beginner's piano music is usually written in a five finger position. This means that each finger has one key of it's own, and the hand stays in that position for the duration of the tune.
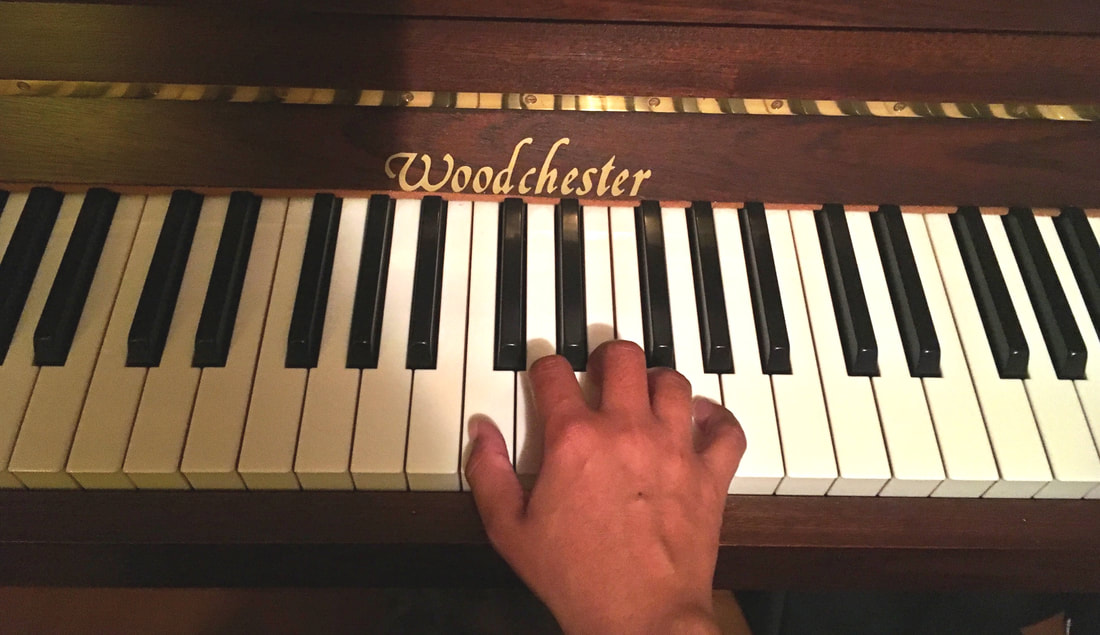
For the tune I'm about to show you, the right hand will be in a five finger position with the thumb on middle C. See the pictures below:
For the tune I'm about to show you, the right hand will be in a five finger position with the thumb on middle C. See the pictures below:
Your thumb (1) is on middle C, 2 on D, 3 on E, 4 on F and 5 on G. This is often referred to as middle C position.
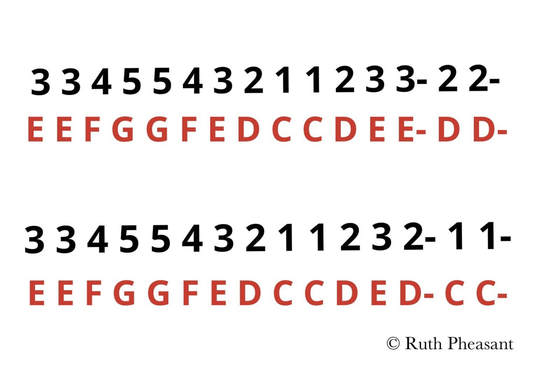
In this position you'll be able to play a simple extract from a famous tune called "Ode to Joy" by Beethoven. Here is the sequence of notes you will need to play, with the corresponding finger numbers:
I have put dashes next to the notes that need to be held a little bit longer. This is an aspect of rhythm and makes the music sound more tuneful than if all the notes were played the same length.
Here are videos of me demonstrating how to play the tune from two different angles:
Don't worry if you don't get it right first time. It can take some practice to get used to using your fingers in such a new way, and to learn to move them independently and under control. You also need to give yourself a chance to learn and remember the finger numbers and letter names of the white keys.
I hope you have enjoyed learning to play your first right hand tune.
I hope you have enjoyed learning to play your first right hand tune.
A Left Hand Tune
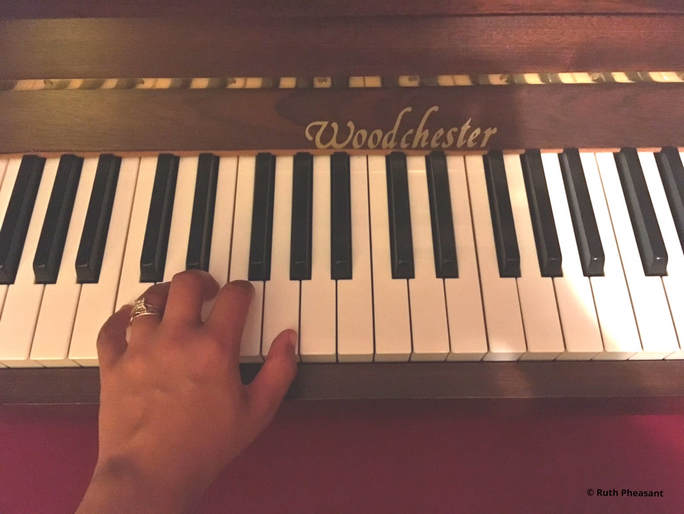
Now you can learn how to play a tune in the left hand too. For the tune I'm about to show you, the left hand little finger will be on the C below middle C:
Your thumb (1) is on G, 2 on F, 3 on E, 4 on D and 5 on C:
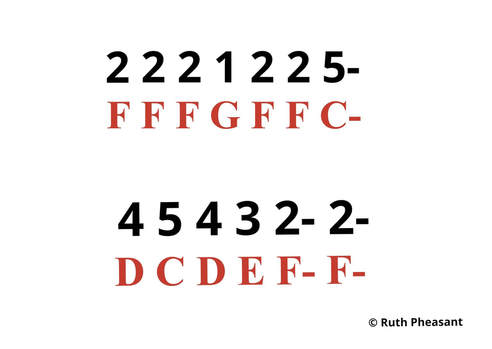
In this five finger position you will be able to play an extract from the tune "Good King Wenceslas". Here is the sequence of notes with the corresponding finger numbers:
Again, I have put dashes next to the notes that need to be held longer.
Here are videos of me demonstrating the tune, with two different views:
Here are videos of me demonstrating the tune, with two different views:
Now that you've learned the basics, you're ready to start exploring more adventurous tunes. Have fun!
Part 2: Learning to read music.


